Bushcraft Shelter Mastery: Perfecting Your Square Arch Tarp Setup

Hey there, fellow outdoor enthusiasts! Are you ready to dive into the nitty-gritty of one of the coolest shelters you can craft in the wild? It’s time to talk about the Square Arch Tarp Setup - your soon-to-be favorite way to bunk down in nature.
A Little History to Set the Scene
Tarps have been a mainstay in the adventurer's backpack since, well, forever. The Square Arch Tarp Setup? It’s the brainchild of innovators who wanted to marry the flexibility of a tarp with the stability of a more structured shelter. Born from the need for versatility and durability, this setup has become a go-to for campers, hikers, and survivalists.
Advantages of Going Square (and Arch)
Why should you give this setup a whirl? For starters, it offers a vast amount of space and height, making it feel like the penthouse suite of tarp shelters. It's also adaptable to various environments - whether you’re in a dense forest or on a mountain ridge.
The structure is a boon when it comes to weather resistance. The arch allows rain to slide off effortlessly, saving you from the dreaded drip, drip, drip on your forehead at 3 AM. And, let’s not forget the wind - this setup reduces flapping better than a scarecrow in a cornfield.
No setup is perfect, though, and the Square Arch isn’t without its quirks. You’ll need some trees around, or at least some sturdy poles, to get your ridgelines up. And, because of its open design, if a storm hits from the side, you might find yourself cuddling up with your gear to keep it dry.
Step-by-Step Guide for Setting Up an Arch Tarp Shelter
Materials Needed:
1. Texas Bushcraft Survival Tarp (10ft x 10ft) with 14 tie-up points
2. Texas Bushcraft Firecraft Cord
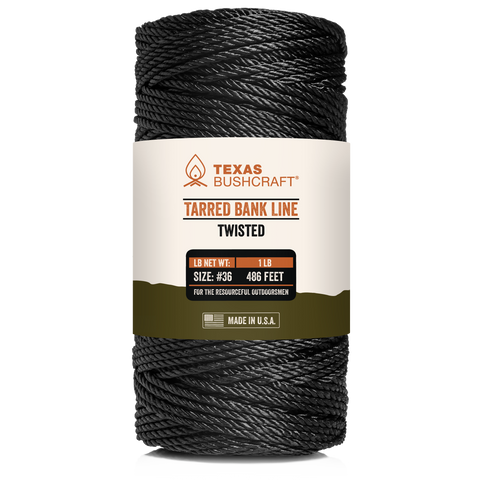
3. Texas Bushcraft Tarred Bank Line
4. 4x or 10x Stakes
5. Two Sturdy trees
(Or optional Four trees forming two sets of parallel lines)
6. Two sturdy sticks or poles (for spreader bars)
Instructions:

Step 1: Location Selection:
Choose two sturdy and thick trees that are more than 10 feet apart to accommodate the tarp's width.
(Optional) For four thin trees setup: Locate two pairs of trees, each pair parallel to the other, spaced more than 10 feet apart.

Step 2: Ridgeline and Spreader Bar Setup:
For two trees: Loop the Firecraft Cord around each tree to create two parallel ridgelines, securing one end with a Bowline Knot and the other end with a Taut-Line Hitch for tension adjustment.
Insert a stick or pole between the two ridgelines at each end where the tarp's corners will be. Secure the sticks to the ridgelines using clove hitches to maintain them perpendicular to the ridgelines and parallel to each other for structural support.
(Optional)For four thin trees: Attach the Firecraft Cord to the first tree in each pair using a Bowline Knot. On the opposite trees, tie a Taut-Line Hitch for adjustability then do the same process of inserting the spreader bar sticks.

Step 3: Drape and Secure the Tarp:
Drape the tarp over the parallel ridgelines, ensuring it is centered.
Locate the tarp's tie-up points that align with the spreader bar sticks at each end. Tie these points directly to the ends of the sticks using Prusik Knots with the Tarred Bank Line. This secures the tarp's corners and prevents lateral movement along the ridgelines.

Step 4: Stake the Corners and Side Tie-Up Points:
Stake out the bottom corners and side tie-up points of the tarp directly to the ground, pulling them taut and securing them with stakes using a simple Stake Knot.
If the ridgeline is set too high and there is excess material on the tarp, or if additional stability is required, use the Tarred Bank Line to extend from the tie-up points to the stakes.

Step 5: Guy Line Installation:
Install guy lines from the upper tie-up points to stakes in the ground, using the Tarred Bank Line for extra stability. Secure the guy lines with Taut-Line Hitches for adjustability.

Step 6: Final Tensioning and Adjustments:
Perform a final walk-around to tighten or loosen the Prusik Knots and Taut-Line Hitches, and ensure all stakes are securely in place, making sure that the tarp is evenly taut and the shelter is stable.
This setup will provide a secure arch tarp shelter without the risk of damage from internal supports. The structure is stabilized by the use of spreader bars, guy lines, and carefully staked tie-up points.
Spotlight on the Texas Bushcraft Survival Tarp
The cornerstone of a successful Square Arch setup is a reliable tarp, and the Texas Bushcraft Survival Tarp stands out. This tarp, measuring a roomy 10x10 feet, is constructed with 70D ripstop nylon, complete with a 15,000mm waterproof PU coating to stand firm against the fiercest downpours.
Reflective material on the underside serves a dual purpose: it reflects heat back to you in cold conditions and deflects sunlight to keep things cool in the heat. It's also designed to resist damage from fire sparks, adding a layer of safety to your campsite.
With 14 robust tie-up points reinforced with brass grommets, setting up is straightforward, ensuring that you can erect a shelter quickly when time and conditions are pressing. And when the journey is done, it all tucks away into a compact sack that epitomizes convenience.
Wrapping Up: Your Trustworthy Shelter Companion
For those who love the great outdoors, the Square Arch Tarp Setup with the Texas Bushcraft Survival Tarp is a combination that offers security and comfort in the wilderness. This tarp isn’t just a shelter; it’s a statement of resilience and adaptability.
Embrace the spirit of adventure with confidence. With the Texas Bushcraft Survival Tarp, you are well-equipped to forge memories in the great outdoors, no matter what the skies may bring.

Who We Are
At Texas Bushcraft, we are a small family-owned business founded in 2018 in Austin, Texas. We were motivated to share our love for the outdoors and inspire others to enjoy nature without the need for big, fancy gadgetry. Our mission is to preserve traditional bushcraft skills and support our customers on their path to self-reliance. We offer simple, elegant outdoor gear and educational resources to help you prepare to thrive in the great outdoors. Thank you for choosing Texas Bushcraft as your guide.